Anthony Thomas
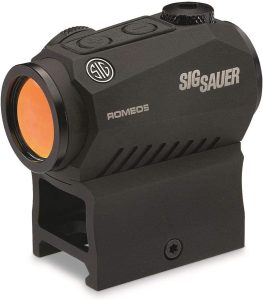
The Sig Sauer Romeo7 is the red dot for people who looked at the micro dot trend and said no thank you.
It is a proper full size tube sight. Thirty millimetres of window, a machined aluminium body you could hammer tent pegs with, a 2 MOA dot, motion activation, and a battery compartment that takes a plain AA. In a market of tiny sights with tiny batteries, the Romeo7 is deliberately big and simple.
Sig Sauer Romeo 7 problems, then, are not about the concept. The problems are the friction points around it: the weight that comes with all that aluminium, turret caps that fight you at zeroing time, a quick detach mount that needs patience to set up, and a dot that occasionally goes missing for reasons you have to diagnose properly before blaming the sight.
Quick verdict: The Romeo7 is one of the toughest budget red dots ever sold, and most of its problems are the price of its virtues. It is heavy because it is built like a tool. The caps are stiff because they seal. The dot sleeps because MOTAC is saving your battery. Set the mount up once, learn the turret caps, feed it a decent AA, and this sight will probably outlast the rifle under it.
Table of Contents
Sig Sauer Romeo7 Specs at a Glance
| Specification | Sig Sauer Romeo7 |
|---|---|
| Reticle | 2 MOA red dot |
| Magnification | 1x |
| Objective | 30mm, closed tube design |
| Housing | CNC machined 6061 aluminium |
| Battery | One AA, low side compartment |
| Battery life | 62,500 hours at a medium setting (Sig figure) |
| Activation | MOTAC motion activation, sleeps when still |
| Brightness | 9 daylight plus 2 night vision settings per Sig listing copy |
| Controls | Manual rotary illumination dial at the rear |
| Adjustment | 0.5 MOA per click, capped turrets |
| Adjustment travel | 100 MOA elevation, 100 MOA windage |
| Mounts included | QD riser mount (1.535 inch optical axis) and low profile mount |
| Size | 4.75 by 2.00 by 3.00 inches |
| Weight | 12.5 oz |
| Waterproof | IPX-7 in most listings (the manual claims IPX-8, see below) |
| In the box | AA battery, flip back covers, thread in kill flash, tools, both mounts |
| Warranty | Sig Infinite Guarantee, electronics limited to 5 years |
One honest note on the waterproof line, because the sources disagree and you deserve to know: Sig’s own manual claims the Romeo7 is IPX-8 rated for immersion up to 10 metres, while most retailer listings say IPX-7, immersion to 1 metre. Either way it is thoroughly waterproof for rain, mud, and a dunking. Just do not take the deeper number diving on our say so.
Sig Sauer Romeo 7 Problems at a Glance
| Problem | How common is it? | How serious? | Can you fix it yourself? | Cost to fix |
|---|---|---|---|---|
| Big and heavy next to micro dots | Every unit, by design | Low to medium | Only by choosing the right gun | Free, it is a buying decision |
| Turret caps extremely hard to remove | Very common complaint | Low | Yes, with the right kit | A coin or tool you already own |
| QD mount tension awkward, base not swappable | Common at setup | Medium | Yes, once, patiently | Free |
| Battery drains faster than the claim | A minority of units | Medium | Usually yes | One good AA battery |
| Dot goes out in use | Occasional reports | Medium to high | Diagnose first | Free checks, warranty if faulty |
| Lens tint and turrets crowd the view | Every unit, mildly | Low | No, it is the design | Free to accept |
1. It Is Big and Heavy, and There Is No Hiding It
Start with the number every reviewer reaches for: 12.5 ounces with the stock mount fitted. A hands on review that liked the Romeo7 a lot still opened its complaints with size and weight, calling it about twice the size of basically every micro red dot, and two to three times the weight of the lighter micro options. Another review listed weight first among its negatives, weighed its unit at 12.6 ounces, and noted the weight was far more noticeable on a short barrelled AR than on a heavy piston rifle. On a light gun, half a pound of optic parked on top is a handling decision, not a rounding error.
The same reviews hand you the other side of the trade in the same breath. What the weight buys is a chunky, durable tube, a big forgiving window, and an AA battery you can buy at a petrol station at midnight. On a dedicated red dot gun, a home defence carbine, a truck gun, or a shotgun, that trade is easy to defend. On a lightweight build where every ounce was argued over, or on a short gun with crowded rail space, it eats the point of the build.
How to handle the Romeo7’s size and weight
-
Match the sight to the gun honestly. Full size carbine, shotgun, or a rifle that lives on a bipod or in a vehicle rack: the Romeo7 is in its element. Lightweight mountain build or a compact gun where the rail is already full: buy a micro dot and do not look back. This is a purchase decision, not a defect to repair.
-
Use the low profile mount where the gun allows it. The box includes both the tall QD riser and a low fixed mount. On a shotgun or a host with a low comb, the low mount drops the sight, improves the cheek weld, and trims a little of the top heavy feel.
- Balance the rifle, not just the optic. A light stock and a heavy front end is what makes 12.5 ounces feel like a brick. Owners who run a magnifier or a light at the front anyway notice the Romeo7 far less, because the whole gun was balanced around accessories from the start. And do not apologise for the big window at the range: it is faster to find the dot in from awkward positions, and new shooters shoot a 30mm tube better than a micro window.
2. The Turret Caps Fight You Every Time You Zero
This is the complaint with the most feeling behind it, and it comes from reviewers who otherwise rated the sight well.
The Romeo7’s adjustments live under aluminium caps, like most tube sights. The problem is the fit. A detailed hands on review describes the housing around the caps as machined very close to them, worse on the top elevation cap than the side windage cap, so there is barely anything to grip. The reviewer, who keeps short fingernails, found the raised bar across the top cap almost impossible to get hold of, and refused to take pliers to a borrowed test optic because the teeth would have torn the finish off the caps. His conclusion, in spirit: you should not need pliers to remove turret caps to adjust an optic. A second review still notes the hassle of removing and replacing the caps, and sums the knobs up as robust and precise once you finally get to them. Getting to them is the chore.
How to zero a Romeo7 without the fight
- Break the caps loose at home, before the first range trip. The first removal is the worst one. Do it at a bench, unhurried, where a stubborn cap costs you a minute instead of a firing point.
-
Keep a cap tool in the range kit. A coin works. So does the flat edge of a multi tool, a thick plastic pick, or a short length of rubber grippy material wrapped around the cap for purchase. The point is leverage without teeth marks. Pliers with bare jaws are how caps get scarred.
-
Bore sight first and the caps come off once. The closer your first shots land, the fewer cap on, cap off cycles the session takes. Most of the frustration owners report is really five rounds of adjustment theatre that a two minute bore sight would have prevented.
- Clean the cap threads when they are off. A dry brush around the threads keeps grit out of that close fitting joint, and the caps go back on straight instead of cross threading against the housing lip.
- Then leave them alone. Once zeroed, the caps being snug and sealed is a feature working for you. Sight the rifle in, record the zero, and let the caps do their quiet job until the gun or the ammunition changes.
3. The QD Mount Needs Patience, and the Base Is Part of the Sight
The Romeo7 arrives with two mounts, which sounds like generosity, and is, but the quick detach mount has its own learning curve. The hands on review that fought the turret caps also lists the base tension controls among its negative points: hard to get to, hard to adjust, and an equally frustrating job setting the tension on the quick detach lever. Once set, the same reviewer found the mounted optic very sturdy. The pain is front loaded into setup day.
The deeper point is the one to plan around: there is no option to swap bases. The mount interface is integral to this sight, so you cannot drop the tube into aftermarket 30mm rings the way you can with a plain tube optic. Your height choices are the ones in the box: the QD riser, which puts the optical axis at 1.535 inches for co-witness and magnifier alignment on an AR, and the low profile fixed mount. If neither height is the one you wanted, there is no third option to buy.
How to set up the Romeo7 mounts properly
- Set the QD tension once, on a bench, with an unloaded rifle. The lever should close with firm hand pressure and the sight should not shift when you try to rock it. Too loose and the zero wanders. Cranked down so hard you need a tool to open it and you have defeated the point of quick detach.
-
Test the return to zero. QD mounts earn their name only if the sight goes back to the same rail slot, lever tension unchanged, and shoots to the same place. Shoot a group, remove the sight, refit it, shoot another. Now you know what your mount actually does instead of what the lever promises.
-
Pick the mount for the gun, not by habit. AR with iron sights or a magnifier behind it: the riser. Shotgun, pistol calibre carbine with a low comb, or anything where you cheek down onto the stock: the low mount. The low mount is also the one to use with the supplied screws torqued evenly, and it is the setup least likely to draw complaints.
- Mark your rail slot. A paint pen line at the mount’s position means every refit lands in the same slot, which is most of what return to zero is made of.
- Accept the ceiling. If you want a very tall mount for heads up shooting, this is the wrong optic, and no accessory fixes that. Buy the height you need in a sight designed for it.
4. Battery Life: Brilliant for Most Owners, With a Minority Reporting Fast Drain
Sig claims 62,500 hours of continuous runtime at a medium setting, over seven years of always on, with MOTAC stretching real world life further by sleeping whenever the rifle is still. Most owners’ experience matches the brochure. Their battery stories are boring, which is the highest praise a battery can earn.
A minority report the opposite: batteries draining faster than expected, in some cases running down even while the sight sits unused. Three ordinary causes explain most of it, and all three are fixable at home.
First, the battery itself. A budget alkaline AA sags early, and an old alkaline left in a stored sight for years can leak and damage the compartment. Second, contact: a battery cap that feels closed but is a quarter turn shy can give you a sight that eats batteries and flickers. Third, MOTAC never gets to sleep. A rifle that lives in a vehicle, or anywhere with constant vibration, keeps waking the sight, and a sight that never sleeps spends its battery like a sight that is always on, because it is.
How to get the battery life Sig promises
-
Fit a quality lithium AA. Lithium cells hold their voltage far longer in storage, shrug off cold, and do not leak the way alkalines can. For a sight you may not touch for a year, this is the single best battery decision you can make.
-
Seat the cap fully and check the contacts. Cap off, contacts clean and bright, battery in the right way, cap on until it is properly home. This ten second routine is the cure for a large share of drain and flicker reports.
- Give MOTAC somewhere still to sleep. Store the rifle where it will not be vibrated awake all day, and if the gun lives in a vehicle, accept a shorter battery interval as the cost and swap the AA on a schedule.
- Change it yearly on a working gun. An AA costs almost nothing and takes a minute, without removing the sight. The 62,500 hour figure is a reason to relax, not a reason to run the same battery for a decade.
- Know the stop point. A fresh lithium AA, in a clean compartment, on a rifle stored somewhere still, that still dies in a matter of weeks is a faulty unit. That goes to Sig under the electronics warranty, and it is their problem to fix, not yours to keep feeding batteries.
5. The Dot Goes Out: Learn to Tell Sleep From a Fault
Few things shake confidence in a sight like shouldering the rifle and finding no dot. Romeo7 owners report it, and the reports split into two very different problems that look identical through the window. Telling them apart takes thirty seconds and saves a lot of unnecessary returns.
Problem one is not a problem at all. MOTAC powers the sight down after roughly two minutes without motion, a figure a hands on review of this sight states directly. A rifle standing in a corner or sitting on a bench will put its dot to sleep, and the instant the gun moves, the dot is back. A share of the dead Romeo7 stories on the internet are simply MOTAC doing the job it was bought for.
Problem two is real. A dot that dies during recoil, flickers as the gun cycles, or needs a tap on the housing to come back is telling you about power delivery, not sleep. The suspects are the ones from the previous section: a tired battery, a cap not fully seated, or dirty contacts. Recoil is a contact test no bench can fake.
How to diagnose a Romeo7 dot that goes out
- Do the stillness test. Turn the sight on, set the rifle down somewhere safe and still, and wait. If the dot sleeps after a couple of minutes and wakes the moment you pick the rifle up, your sight is healthy and you have learned its rhythm. Nothing further to do.
- Do the recoil test. If the dot survives the bench but dies or flickers in live fire, change the battery for a fresh quality AA, clean the contacts, and seat the cap fully. Then shoot again. Most recoil cutouts end here.
- Check the dial while you are at it. The rear rotary illumination dial sets brightness manually. A dot set on one of the lowest settings in bright daylight can look absent rather than dim, especially the night vision settings. Confirm you are testing at a working brightness.
- Stop when the tests stop helping. A dot that still cuts out under recoil on a fresh battery with clean contacts and a proven cap is a warranty return. Sig covers the electronics for five years, the fix is theirs, and there is no affiliate link in this paragraph on purpose: do not buy accessories to work around a faulty sight.
6. Lens Tint and a View Crowded by Its Own Turrets
The Romeo7’s glass gets praised a lot: low dispersion glass, serious coatings, a crisp dot, and good light transmission for the money. It still carries two honest optical complaints, and both come from comparisons rather than failures.
The first is tint. A detailed comparison between the Romeo7 and its smaller brother the Romeo5 lists some lens tint among the Romeo7’s cons. It is the familiar coating trade: the lens treatments that give the dot its contrast cost the picture a little colour neutrality. Most owners never mention it. Owners who shoot several optics side by side notice it in the first session and stop noticing it by the third.
The second is the view around the glass. The same comparison notes that the Romeo7’s protruding turrets block peripheral vision in a way the smaller sight’s do not. This is a big housing with big capped turrets, and shot both eyes open, as it is meant to be, the body takes up more of your picture than a micro dot does. One reviewer also wished the top brightness setting ran a little brighter, which matters against snow, sand, or pale targets at noon.
How to live with the Romeo7’s picture
- Shoot it the way it was designed to be shot. Both eyes open, target focused, dot overlaid. Shot that way, the housing largely disappears from your attention within a few sessions, turrets and all. Shot one eyed, studying the window, you will see every millimetre of it forever.
- Set brightness for the target background. Against bright pale backgrounds the dot needs the upper settings, and that is what they are for. Accept the battery cost, it is pennies a year on an AA.
- Look through one before buying if tint bothers you. Tint sensitivity is personal, and reviews cannot settle it for your eyes. Two minutes at a shop counter can.
- Know the alternative is in the family. If an uncluttered picture is your top priority, Sig’s smaller sights and the Romeo7S exist for exactly that preference, at the cost of the big tube’s durability and battery.
Sig Sauer Romeo 7 Problems That Are Not Really Faults
The dot was off when I picked the rifle up. That is MOTAC after about two minutes of stillness, and the dot returns the moment the gun moves. If yours wakes when touched, it was never broken.
The waterproof rating does not match between websites. Sig’s manual says IPX-8 and most listings say IPX-7. That is a paperwork disagreement, not water in your sight. The Romeo7 is sealed, fogproof, and unbothered by weather either way.
It will not mount at the fashionable tall height. The included mounts are what there is, because the base is part of the sight’s design. A 1.535 inch axis and a low mount cover the guns this sight was built for. It was never meant to be a skyscraper optic.
The kill flash changes the picture. The thread in anti reflection device in the box slightly dims and textures the view, because that is what honeycomb filters do. Take it off for the range and the picture goes back to normal.
Sig Sauer Romeo7 Maintenance Checklist
- Fit a quality lithium AA and change it yearly on a working gun
- Seat the battery cap fully and keep the contacts clean and bright
- Learn the MOTAC sleep rhythm so a sleeping dot never fools you
- Break the turret caps loose at home and keep a coin or tool in the range kit
- Set QD lever tension once, then verify return to zero after refits
- Mark your rail slot with a paint pen
- Store the rifle somewhere still so MOTAC can actually sleep
- Wipe lenses with a proper cloth, and flip the covers down in storage
Is the Sig Sauer Romeo7 Still Worth Buying?
Yes, for the buyer it was designed for, and the durability record is the reason the answer stays yes.
This is a sight that a magazine froze solid for two days, and that other testers soaked, baked, and dropped from shoulder height onto concrete, and it kept working through all of it. It zeroes quickly, its window is big and honest, and it runs on the most available battery on earth. Against that, the problem list is a stiff pair of caps, a mount that rewards ten patient minutes, and a quarter pound of extra confidence on top of your rifle.
Buy it for a carbine, a shotgun, a truck gun, or any rifle where tough and simple beats small and clever. Skip it for a lightweight build or a rail with no room to spare. The Romeo7 knows exactly what it is. The owners who are happy with it are the ones who bought it for that.
FAQs About Sig Sauer Romeo 7 Problems
Q: What are the most common Sig Sauer Romeo 7 problems?
A: The weight and size compared with micro dots, turret caps that are very hard to remove by hand, a QD mount that takes patience to tension, a minority of units draining batteries faster than the claim, dots that go out because of MOTAC sleep or battery contact, and mild lens tint. Most are setup and habit issues rather than failures.
Q: How long does the Romeo7 battery actually last?
A: Sig rates it at 62,500 hours of continuous runtime at a medium setting, and MOTAC extends real world life by sleeping whenever the rifle is still. Most owners get years from one AA. If yours dies in weeks, check the battery quality, the cap seating, and whether vibration is keeping MOTAC awake, in that order, before assuming a fault.
Q: Why does my Romeo7 dot turn off by itself?
A: Almost always, MOTAC. The sight powers down after roughly two minutes without motion and wakes the instant the rifle moves. Test it: set the rifle down, watch the dot sleep, then pick it up. If it wakes on movement, it is healthy. A dot that dies under recoil instead is a battery contact issue, so change the battery, clean the contacts, and seat the cap fully.
Q: How do I get the turret caps off a Romeo7?
A: With leverage, not fingernails. The caps sit very close to the housing, especially the top one. Use a coin, the flat edge of a multi tool, or a strip of rubber for grip, and break them loose at home before your first zeroing session rather than at the range. Once off, keep the threads clean so they go back on straight.
Q: Does the Romeo7 hold zero when removed and refitted?
A: Yes, if the QD mount is set up properly. Tension the lever so it closes with firm hand pressure, always refit to the same rail slot, and confirm with a short group the first time you rely on it. A mount that shifts after that routine needs its tension revisited, and a sight that still wanders goes back to Sig.
Q: Is the Romeo7 too heavy for an AR-15?
A: At 12.5 ounces it is heavy for a red dot, roughly two to three times the weight of light micro dots, and you will feel it most on a short or lightweight build. On a standard carbine, a shotgun, or a truck gun, most owners stop noticing it quickly and value the big window and the durability the weight bought. It is a matching question, not a quality question.
Q: What battery does the Romeo7 use and can I change it without losing zero?
A: One AA battery, in a low side compartment, and yes. The compartment is designed for quick replacement without removing the sight from the firearm, so your zero is untouched. Fit a quality lithium AA for the best storage life, and ignore any listing that says this sight takes a CR123A. That is a retailer error, the manual and the sight both say AA.
Conclusion
Sig Sauer Romeo 7 problems make sense the moment you hold the sight.
It is a big aluminium tube built to be dropped, frozen, soaked, and shot for years on one AA battery, and nearly everything owners complain about is that brief showing through. The weight is the durability. The stiff caps are the seals. The sleeping dot is the seven year battery.
Learn its habits, set the mount tension once, keep a lithium AA in it, and break the turret caps loose before you need them at the range. Do that and the Romeo7 becomes what its long term owners say it is: the budget red dot they stopped worrying about first.
Sources used for this article: the Sig Sauer Romeo7 instruction manual, hands on reviews from Loadout Room and The Arms Guide, gun.deals and GunMag Warehouse, a RedDotHeaven comparison with the Romeo5, ScopeMagnification and TheGunZone reviews, owner complaint roundups, and Sig retailer specification listings. Last updated: October 2026.